Tutorial: Super Simple Crocheted Water Bottle Holder in 5 Steps (Great First Project!)
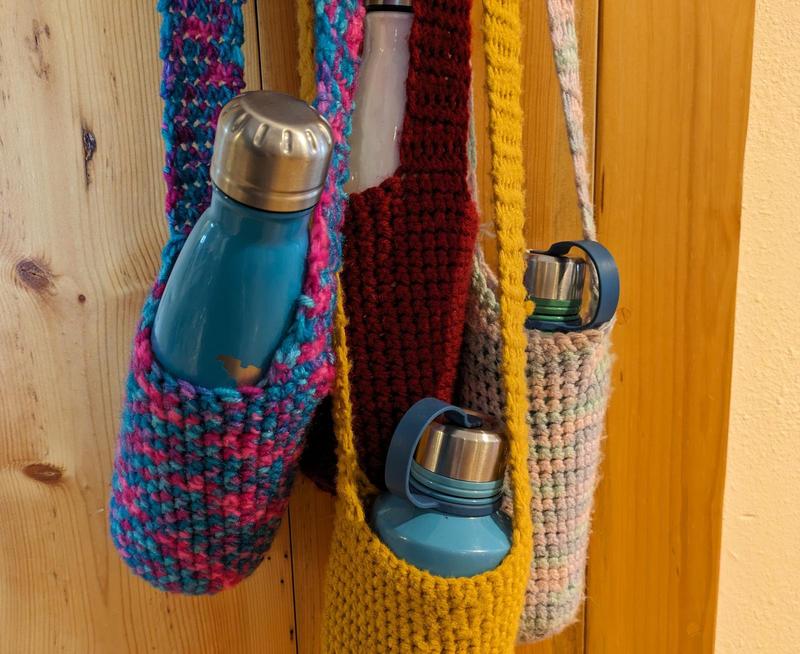
One of my first crochet projects was a simple water bottle holder. A classic Waldorf school project, it's useful for carrying a water bottle on short hikes or walks.
This is a great first project. It only uses the most basic crochet stitches: a chain and then a lot of single crochet. (If you want to make something fancier, there are plenty of other free patterns online!)
(Read: How to Consciously Be A Role Model in Creativity, Curiosity, and Crafting for Children)


Step 0: Supplies
- Yarn. You won't need a whole ball; this is a good project for leftovers! Mine used about half a ball of yarn. It would also be straightforward to switch colors partway through if you want to use up scraps.
- A hook that fits the yarn. Hook gauge isn't that important.
- Scissors
(Read: Tutorial: How To Make a Braided Rag Rug from Old Sheets or T-Shirts)
Step 1: Start chain
Start your chain with a slipknot around your hook. Chain 4 stitches. Don't make them too tight—you'll need to be able to stick your hook back through them!


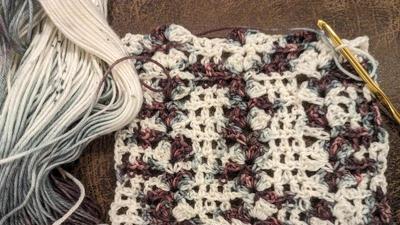
Step 2: Make a disk
Single crochet in the second chain stitch. Then in the first chain stitch. Then keep going around, into the next stitch.
Don't worry if you can't tell what's a stitch and what's not. It'll get more clear the second or third time around the disk, and it doesn't actually matter in the middle. Remember not to pull your stitches too tight!
Once you've done four or so single crochet stitches, do two single crochet stitches in the next stitch. This is how you increase around the edge of the disk. Do two single crochet stitches in all the stitches around the disk and it'll grow nicely.
The goal here is to spiral around the disk, making it bigger and bigger until it is the size of the base of your water bottle.


(Read: Tutorial: How to Make a Plush Rag Rug from Old Socks!)
Step 3: Make a cylinder
Your disk is big enough. Now, stop increasing as you go around. Instead of putting two single crochet stitches in each stitch, just do one. As you go around the disk, your stitches won't make the disk wider—instead, it'll start to look like a bowl! You're making a cylinder.
Keep going around and around until the cylinder is tall enough for your water bottle.


Step 4: Add a carrying strap
When the cylinder is tall enough, crochet a carrying strap. Here, we switch from crocheting around in a circle to crocheting in rows.
Chain one stitch, then turn.

Single crochet through the next 6 stitches. That will give you a handle 6 stitches wide. I did one holder with a strap that was only 4 stitches wide and it feels too skinny, and like it stretches out too much.

Chain one, turn, do another row. Lather, rinse, repeat.


Measure the strap on yourself (or your kid; whoever will be wearing it). It will stretch some with the water bottle in it, so err on the short side. The straps I've made range from 30-36".
When the strap is long enough, attach it on the opposite edge of the cylinder.
Line up the strap so it is across from the other end of the strap. Then, we're going to single crochet across, with each single crochet going through both a stitch on the strap and one on the bottle holder too, connecting them.


There is probably a prettier way to attach it. This is functional, though, and straightforward, requiring no new stitch types.
(Read: How I Made a Linen Wrap Skirt With Rainbow Embroidered Flowers)
Step 5: Tuck in the ends
Last, tuck the cut ends of the yarn in at the strap end and at the middle bottom. Weave them into the other stitches so there's no dangling bit.


Projects: Learning to Crochet! Scarves, Water Bottle Carriers, a Hat, and Shawls